The First Step
Amazon’s popular AWS has dozens of services, with many freely available. In order to take advantage of their offerings, we start with registration at Amazon. Existing account holders can add these services to their existing account and can skip this step of the process.
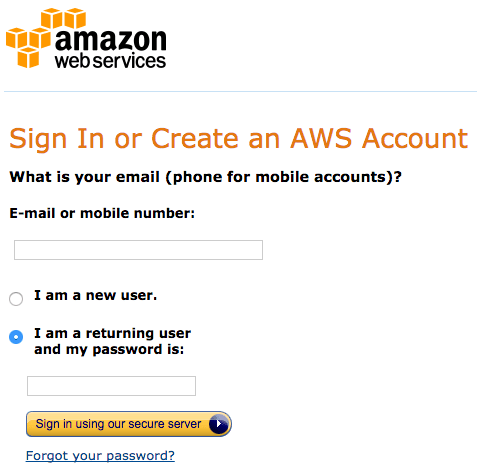
1 Go to http://amazon.com/aws
2 Click on the “Create a Free Account” Button.
3 Enter a phone number or email address for the site.
4 Select the “I am a new user” option and click on the Sign in button
5 Enter in your information and submit. Email and phone are important parts of getting started so make sure that information is correct.
6 Select personal account and enter your information
7 Enter in payment information (charges should be non-existent the first year but you will need to provide a credit card)
8 Answer the phone call from Amazon and enter the pin.
9 Leave Basic (Free) selected
10 Click on complete sign-up and enter your login information
Next Steps
Congratulations you now have your AWS account created. You can click on the “services” menu item to see the full list of services available from Amazon. Your home is referred to as the “AWS Management Console.” Remember that as we will often start from the Console as we add and configure services. Before moving forward take a look at all the services included under the AWS umbrella. There might be a few that interest you.
If you are going through the Introductory Course, click here to return to the class
Check out more of our Tech Notes to take the next steps with your Amazon account.
Further Reading
You can always check out some more of our articles to learn more, but if you want to learn more just about AWS check this out:
Getting Started with AWS
[sgmb id=1]

