We are big fans of the Amazon services and the free tier in particular. The site you are on includes a WordPress server, and we like to use Amazon to help out our administration of the server and its applications. One of our regular tasks is backing up and migrating applications to other servers. In this article, we will look at how to easily backup and restore your server to Amazon S3.
The Amazon S3 Plugin
One of the strengths of WordPress is the number of plugins available to it. You can add too many plugins however there are some that just make sense. With that in mind, let’s look at a plugin that will help us simplify a common task. The backup plugin may not be one you can’t live without, but it is one I like.
The plugin we are going to use today is called “S3 Bubble Backup.” S3Bubble is an easy plugin to install. Just follow these steps.
- Log in to your WordPress admin account
- Select the Plugins menu item
- Click on the Add New button
- Search for S3Bubble
- Click on Install Now
Configuring the Amazon S3 Plugin
Now that the plugin is installed, we need to configure our Amazon S3 account. Start by selecting the S3 BubbleBackup menu option in the WordPress admin. The s3Bubble Backup page will have a form to enter your two AWS access keys. Now we need to get our credentials. You can click on the “How to…” link or follow these steps
- Log in to the AWS Console (check out our article on Amazon AWS Registration to create a free account)
- Select Services->Security & Identity -> IAM from the menu
- Select the Create User option on the IAM screen
- Next, fill in the username. The screen has fields to create a few users at a time, but just enter one
- A confirmation message will be displayed
- Before you leave the screen, click the Download Credentials button in the lower right.
- Click on the Show User Credentials link
Now copy and paste the access values from the IAM screen to the plugin settings on your WordPress site. Next, click the Save button in WordPress.
Configuring Permissions
We need to grant our new user access to our S3 data. Use the IAM console to select the user you created. There is a tab called “Permissions” on the user screen. Select this tab and then click on the Attach Policy button. You will see a long list but can jump to what you want by typing S3 in the filter. Now check the box for the AmazonS3FullAccess policy and click Attach Policy.
Setting Up Your Amazon S3 Bucket
With that done, we can move on to create our bucket. Get started by selecting the S3 service in the AWS console. Click on Create Bucket and provide a unique name. Select a region and make sure you remember the region selected. Click on create to make your bucket.
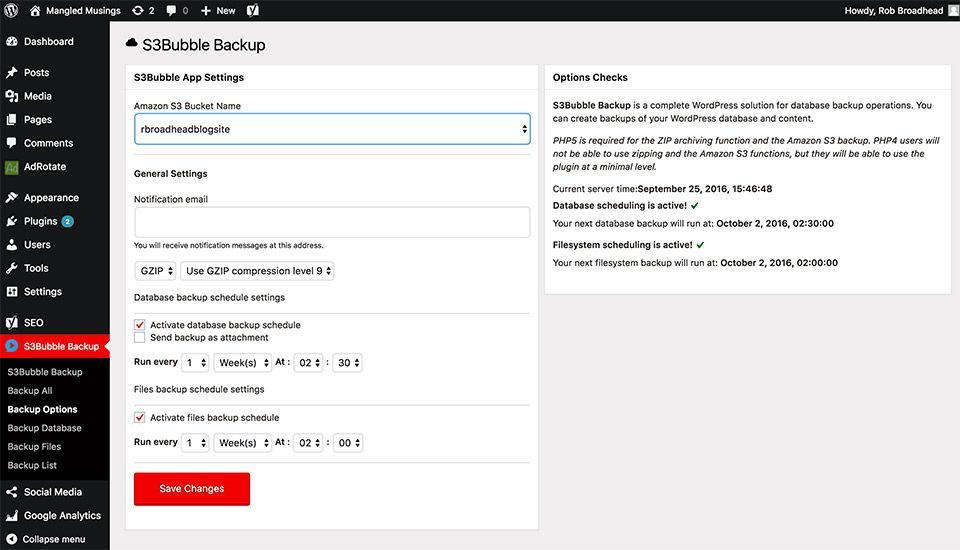
Select the Backup Options menu item from your WordPress administration page. Next, choose the bucket to use for backups from the drop down list. Refresh the page to ensure the newly created bucket appears on the list. Now you can set up you schedule for backups.
That’s it! Now your backups will run, and you can check them out with the Backup List menu option. We will go over how to restore and migrate our WordPress site in a follow-up article. Until then, leave a comment if you have any questions or experiences you want to share with this and other WordPress plugins.
[sgmb id=”1″]