Launching your EC2 Server
Now that we have registered our Amazon account, we can start our EC2 server. EC2 stands for “Elastic Compute Cloud”, which is more technical than it seems. EC2 is just the name Amazon uses for their virtual servers. These are similar to the servers you have access to when you subscribe to any web hosting service.
The steps in this tutorial may seem daunting at first. However, this is less complicated than one might think. Now let’s get started!
- Log in to the AWS console
- Make sure your region is East coast (by your login name in top right, and assuming your free accounts east coast)
- Click on EC2 in the section titled “compute.”
- Select Launch Instance and you will see a list of server options
- Click on the select button by Amazon Linux AMI the HVM version, 64-bit
- Select T2.micro (if it is not already), Click on Configure details
- Click on protect against accidental termination, click on add storage
- Change the Size to 30 (GB), uncheck delete on termination
- Click on Tag Instance
- Create a new security group named Development, add description
- Click on Add Rule and select HTTP
- Repeat and select https this time
- Click on review and launch
- Review and click on the launch button
- Click on create a new key pair, enter a name (maybe your site name or your initials)
- Select download key pair
- Click on launch instances then click on view instances
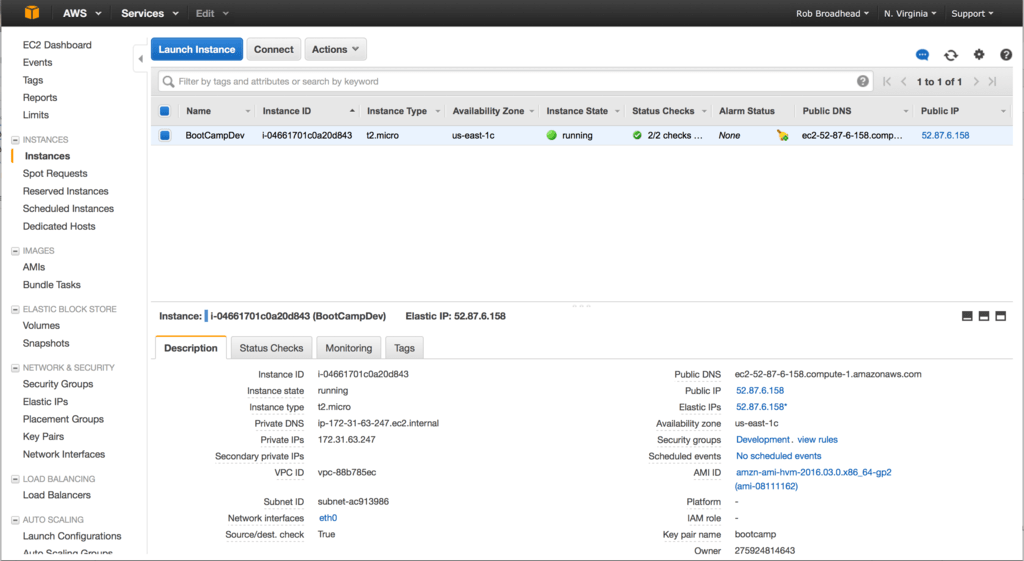
- You should see an instance sort of like this:

- The name is set by you. The instance type should be t2.micro and it should show running. Sometimes it takes a few minutes for it to come up the first time.
Now it is time to connect to the server. Next, we will put it to use…
Click here to return to the class
[sgmb id=1]

