
Permissions in WordPress can be a fickle thing. File permissions affect everything from uploading a file, installing plugins, installing themes, and saving configuration settings. Finding the solution can be tedious since there are so many options and solutions one can find by googling the topic, but which ones are right. We are going to look at the differences between changing the individual file permissions versus changing the folder and file owner. Even though both solutions will work, we feel that changing the owner is a more secure and less risky option than changing the individual file permissions.
How do I know if my permissions are to secure?
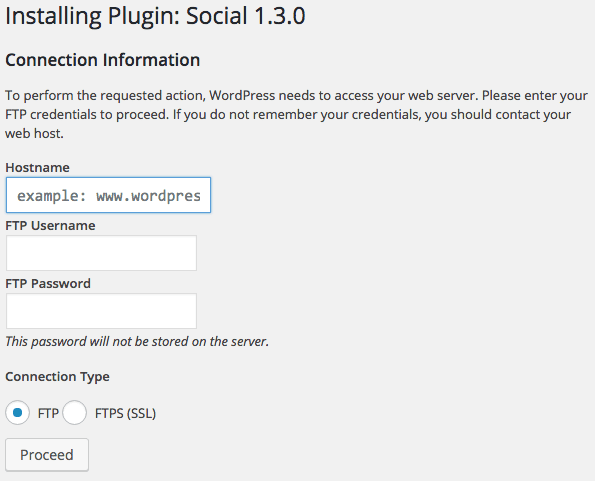
One way to tell is if you encounter an FTP page when trying to download a plugin or theme:
Another, is you receive a message unable to create a directory or update a file due to invalid permissions:

What are my options?
For most WordPress administrators they want to be able to administer their WordPress instances from within the WordPress dashboard. There are really only two options to choose from to do that. One way is by changing the individual file and folder permissions with (CHMOD), or changing the ownership of the WordPress directory and its subdirectories (CHOWN).
CHMOD vs CHOWN
> sudo chmod 777 /var/www/html/wordpress_instance_name
A lot of sites and message boards suggest changing your WordPress directories and file access permissions using chmod and setting the permissions to 777. Once done set the permissions back again. Although this is a workable solution, it is really not a good idea to do this. Why not? Well for starters changing your WP folders permissions to 777 all your files and folders are writable by everyone who has access to your system. If this is a private system the risk is minimal. On a public , there is a higher risk of exposure.
> sudo chown -R apache:www /var/www/html/wordpress_instance_name
In this example, we are changing the ownership of our wordpress_instance_name folder and files to apache (web server owner). This is a more secure and less risky path than CHMOD. This way the only user who will have access to our WordPress files is our web server’s owner (in this case apache). Since the account is already running on the web server that our WordPress instance lives on this should pose little or no risk. Therefore, we recommend this approach over CHMOD.
How to fix the pesky FTP screen?
Fixing your file permissions on your server was just the first step. Now you need to make one additional change to your wp-config.php file to remove that annoying FTP page. This issue mainly occurs when WordPress is running on a public (or shared) system.
Add this code to your wp-config file
/** Sets up 'direct' method for wordpress, auto update without FTP */
define('FS_METHOD','direct');
Steps to modify your wp-config.php file
- Connect to your server hosting WordPress.
- Open up config file: sudo vi wp-config.php.
- Press the “i” key to enter into edit mode.
- Scroll down to the end of the file and press enter to add 2 lines.
- Copy and paste the code into those new lines.
- Press the “Esc” key to exit editing mode.
- Now type “:x” to save your changes.
Further Reading
Outside of additional classes here, we have found these sources to be great for learning more about WordPress:
- Check out these books:
That’s it. With this ‘direct’ method implemented, you will be able to update or upgrade your WordPress, plugins, and theme installations to newer versions without having to provide any FTP details. If you are taking our “Introduction to WordPress” class click here to return to where you left off.
[sgmb id=”1″]